Last Saturday I had the opportunity to post a Retro Ornament Tutorial at Lines Across by Rachel.
I was so honored that she allowed me to participate.
Before I actually get to the tutorial though, I thought I would share how Rachel and I met. I tend to tell a long story so I won’t do that to you and will make it short and sweet.
We first met at Haven (a blog conference…my first) in which we were roomies. BTW…we were 2 of 4 of us that hadn’t met until Haven. Well…Rachel and Lauren knew each other…but that was it. 4 women, 2 beds, 1 room. And yes that means 1 bathroom. Ha! But we made it through and have the memories to prove it. Anyway…budding blog-ship ever since.
Memory Lane. Ahhhh!!!
But onward.
Ok…I do have to share one more story…
Why I chose to DIY these particular ornaments.
One day, not so long ago, I happened to be internet shopping and saw these fabulous Dept 56 Ornaments on Gilt. I love Gilt.
And of course, they were already sold out. With my OCD issues (don’t we all have some?), I couldn’t stop thinking about them. So what did I do? I tried to find them somewhere else online to order!!! It was not an easy task!
Finally though!!!
I found them!
I put them in my shopping cart and was about to pay until I realized that they were $80! Whoa! $80. Insane! And I couldn’t tell how many I would be getting for that $80 (plus shipping still) as there wasn’t much of a description. And I only found them on one site. Hours and hours of searching (ok…well not hours, but you get the idea) and only on one site! And expensive!
Of course, I decided to try to make them myself. And I am going to share with you how I did that so that you can either replicate it yourself or be inspired to come up with your own design.
See…I kept my stories short after all!
So!
Here are my supplies:
- Red and Turquoise Balls – you can use any color
- Glue Pen – I bought 2 different tip widths
- Glitter – in any and all colors
- Thin Paint Brush
- Bowls – for each of the glitter colors
- Egg Holder
- Ribbon and Scissors (optional)
- Lots of Kitchen Wipes and Paper Towels – to clean up your mess
You’ll need the Egg Holder to sit your ornament on while you work.
Really…all you have to do is use your glue pen and create your design.
Above you can see I made lines. But below in other views you will see other designs such as circles.
Then add your glitter.
To clean up the glitter from the areas that are not glued, you can use your fingers (which work the best), blow on them and/or use a brush.
Notice…I saved you from having to see a picture of me blowing the glitter! Thankfully!
You can use multiple colors and create various different designs.
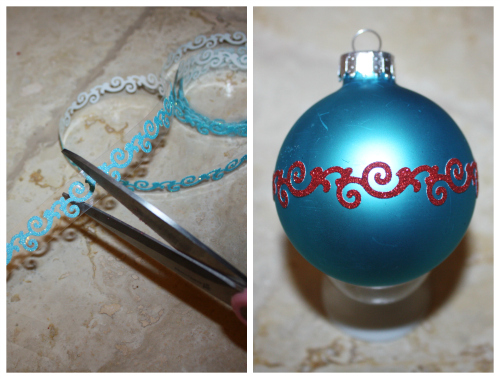
You can also use an assortment of ribbons. I only used one sort, in two different colors, but you can also find washi tape and lace in the craft store. Some you will have to add glue, but most already have a glue/tape backing.
And you are done!
Now how easy was that? I will tell you, however, it does make quite a mess. So be prepared for glitter all over or around your workspace and yourself.
I hope you were all inspired. You still have time to make some yourself. And include your children. Emma had fun participating as well!
A big thank you to Rachel for allowing me to participate. I hope you enjoyed my ornaments as much as I did.
And be sure to stop by Lines Across to see all the other ornaments for more inspiration!
I especially loved these Braided Wreath Ornaments by Rachel herself.


I love this project! I know these are beautiful on your tree.
Oh you are awesome Paula!!! Thank you so much!!!
I love how these turned out, Denise! Thanks for sharing them as a part of the series. Haven was a lot of fun (and it was scary rooming with 4!) Fortunately it all worked out and was a great time (even though I was feeling pretty sick!).
Well…being sick was terrible but good at the same time. Thank you for the support and even allowing me to participate. I appreciate our friendship. Thank you!