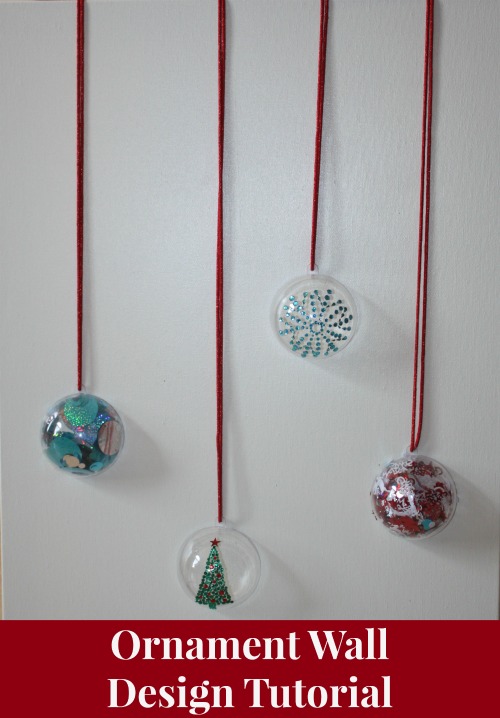
I so love the Christmas Season. Definitely my Favorite time of year. I love the parties, baked goods, Christmas programs (both on TV and live), the lights, buying the perfect gift and decorating my house. Decorating does include, as you all know by now, my walls.
So I am going to provide you an Ornament Wall Design Tutorial below.
Last year I crafted 4 Designs that I am going to show you how to do yourself. While you may not want to do these exact ones, the idea is that I am giving some inspiration to come up with your own. I also want you to see how easy it is to do. These each took less than hour. Probably took me longer to figure out what I wanted to do that it did to actually create them.
But again…this one is the ornament theme. Tomorrow will be a surprise!!!
Supplies needed for this one are:
- Canvas (whatever size you might need for your wall space)
- Clear Ornaments that can be opened (are 2 halves)
- Embellishments and/or Fillers (see below for more info on what these really are)
- Mod Podge or any type of glue
- Ribbon, String or Rope
- Scissors
- Staple Gun
- Needle
- Thread (color that matches the ribbon, string or rope)
There are many optional items and I will try to give you some of those options as we go through this tutorial.
Ok…
Lets start with your canvas. For this design, I just used the basic white canvas. However, the one that I made last year, I actually painted it an ivory color. You can also get crazy and paint it any ol’ color you want. Up to you. Let your creative juices flow!
Once you have your canvas ready, you will want to position your ornament halves so that you have an idea as to placement before you start gluing.
Use your needle and make a hole in the canvas where the ornament hook would normally be thread.
Cut your string the length needed to loop through the hook opening and then string back up to the top of the canvas. Place the middle of the string, rope or ribbon on the canvas where each hole is and sew such that the string, rope or ribbon stays in place. You can use the same threaded needle to go through each of the holes. The backside will then have long lines of thread between/connecting the holes.
Take one end of the string and thread through the ornament hook. At this point you have not decorated them.
Flip your canvas over and staple the string, rope or ribbon in place. Obviously your canvas is not lying flat because you have these ornaments on the front side that prevents you from being able to lay it flat. That’s Ok. Do the best you can. If the staples do not make it all the way in…just use a hammer and hammer them in until they are flush with the wood frame.
Choose the embellishments (to be placed on the exterior of the ornament) and decorate the ornaments that you want embellished.
Choose any fillers and fill half of the ornament.
I used both..alternated.
With this one…I actually used some color on the canvas itself. You can cut construction paper and glue in place, or use paint.
Now its time to glue the ornament halves to the canvas. This can be tricky. You will want to first glue the ones that are embellished. I used Mod Podge. Put glue around the rim and place them on the canvas to dry.
Once dry, cover the rims of the filled ornaments with mod podge or glue as you did for the embellished ones. Then slowly flip the canvas over (being careful to not let the filled ornaments spill out. When upside down, position the ornament half on the canvas.
Slide your hand under the ornaments and flip back over, right side up, to dry.
And you are done!!! Finished product.
Hope I inspired you! Can’t wait to show you tomorrow’s.
BTW…I now have an extra design if someone wants it. If so, email me and let me know!
Don’t forget to link up at Share it Sunday or peruse the links for Inspiration.
And if you have not yet Entered for your chance to win either Disney Tickets or Gift Certificates, valued at $600, do so now. Ends on December 5th.


