It doesn’t matter whether I am decorating for Christmas or for the Fall, I like my walls to also fit within the design. The Current Prints, are great, but are just not as Fall-ish (I know…not a word) as I would like. To remedy that I decided to create my own Fall Wall Designs to replace these:  In a later post I will share with you several options that you have available to create your own Wall Designs or Artwork, but this post is specific to using Burlap.
Supplies needed:
- Canvas
- Burlap
- Scissors
- Hammer
- Stapler Gun
- Staples
- Wire
- Wire Cutter
- Iron
- Ironing Board
- Wreath
To Dress the Canvas
Step 1: Choose the Canvas size and buy the Burlap.
Step 2: Iron Burlap
Step 3: Lay Canvas on Burlap and cut excess Burlap
Step 4: Staple Burlap to Canvas
And there you have it…Canvas is Dressed!
For the Wreath
I could not find a finished Wreath that I wanted to use. It doesn’t really matter what type of wreath you choose: one you bought or one you made. If you make your own, there are also so many different options so get creative.
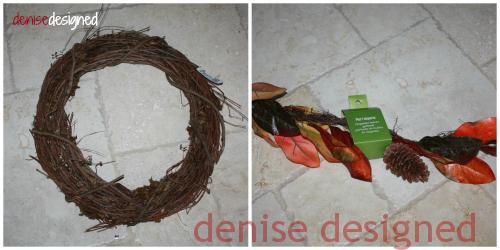
I bought a Twig Wreath and Garland.
You will need to use the Wire and Wire Cutters
Attach the Garland to the Twig Wreath
Choose a Ribbon of some sorts to hang the Wreath
I chose a chevron burlap but there are so many more options available. The ribbon will need to be wrapped around the wreath and secured with wire.  I didn’t take a picture, but you will want center the wreath and ribbon and staple the ribbon to the back of the canvas to hold in place. I think the video that is included will provide you more specifics.
You now have a completed DIY Fall Burlap Wall Design.
I will provide pictures of both in the upcoming Fall Home Tour.
Related articles…
- All Fall Designs (denisedesigned.com)
- All DIY (denisedesigned.com)
- DIY Fall Wall Design Video Tutorial (denisedesigned.com)


